

Table of Contents
- What to Look for in a Smart Home Security System
- DIY Home Security System Installation: Why It Works for Beginners
- Best Wireless Security Cameras for Beginners
- Smart Home Security Monthly Fees and Pricing Models
- Monitoring Options: Professional vs. Self-Monitoring
- Smart Home Ecosystem Compatibility
- Frequently Asked Questions
Last Updated: September 19, 2026
What to Look for in a Smart Home Security System
Choosing the right smart home security for beginners means balancing ease of use, cost, and features that matter. A 2026 Consumer Reports survey found that 83% of shoppers want outdoor cameras and 81% prioritize video doorbells. At TechyDealy, we help you avoid overspending on unused features while ensuring adequate protection.
The best smart home security for beginners doesn't require technical expertise or long-term contracts. Smart home technologies provide essential security functions by sensing, assessing, and responding to environmental threats National Center for Biotechnology Information research on smart home security, and modern systems make this accessible to anyone willing to spend an afternoon on setup.
Essential Features for Beginners
Start with motion sensors, entry sensors, and a mobile app. Motion sensors detect movement; entry sensors monitor doors and windows. A clear app lets you arm, disarm, and check your system from anywhere.
Video doorbells and outdoor cameras provide visual confirmation and deter intruders. Night vision works in darkness; two-way audio lets you speak to visitors remotely.
Battery backup and cellular backup are essential. Cellular backup maintains connection to monitoring services if internet fails; battery backup keeps sensors active during power outages.
DIY Installation vs. Professional Setup
DIY installation means you handle setup yourself. Professional installation means a technician visits your home and configures everything. For beginners, DIY wins on cost and flexibility. SimpliSafe is ranked as the number one system for DIY security PCMag's 2026 annual review of smart home security systems, with systems that mount with adhesive strips and connect via Wi-Fi in under an hour.
Professional installation costs extra but eliminates setup anxiety. ADT is recognized for delivering the best professional installation Security.org's 2026 industry benchmark for installation services, handling everything from wiring to configuration. Choose professional installation if you're uncomfortable with technology or have a complex home layout.
| Installation Type | Time Required | Cost | Best For |
|---|---|---|---|
| DIY | 1-2 hours | $200-$600 | Tech-comfortable homeowners |
| Professional | 2-4 hours | $400-$1,200 | Those wanting expert setup |
DIY Home Security System Installation: Why It Works for Beginners
DIY installation is standard for beginners because wireless systems eliminate drilling and wiring. Most use adhesive strips or simple screws. Download the app, create an account, add sensors, and you're done.
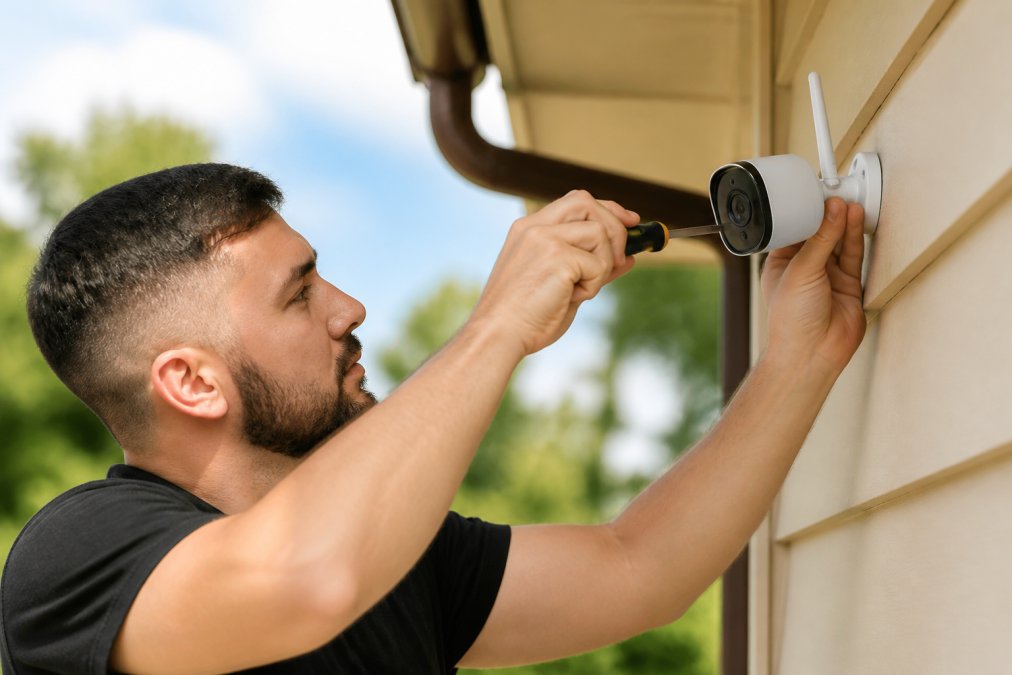
Wireless sensors communicate via your home Wi-Fi or a dedicated hub. No cables running through walls. No appointments with contractors. No waiting weeks for installation. SimpliSafe, Ring, and Cove are the top-rated providers for no-contract security plans SafeHome.org's 2026 analysis of flexible, non-contractual security options, all offering DIY-first experiences that work for renters and homeowners alike.
Why Renters Need DIY Security
Renters need damage-free, removable systems that require no landlord approval, since permanent modifications are typically prohibited.
Adhesive-mount cameras and sensors solve this. 3M Command strips hold devices securely without leaving marks. SimpliSafe's entire line uses adhesive mounting. Ring's battery cameras and Cove's wireless sensors also use adhesive backing.
When you move, take the system with you, no equipment left behind or damage disputes. This flexibility appeals to renters.
Renter-Specific Installation Checklist:
- Choose adhesive-mount cameras and sensors (no drilling)
- Test adhesive strength on a small, inconspicuous area first
- Avoid placing sensors on textured walls where adhesive won't grip
- Use a hub that connects via Wi-Fi (no hardwired connections)
- Document the original wall condition with photos before installation
- Keep all adhesive strips and hardware in case you need to remove and reinstall
- Confirm your lease doesn't prohibit security cameras (most don't, but verify)
Installation Steps for Beginners
Step 1: Choose Your Hub Location Place your hub in a central location with strong Wi-Fi signal, typically near your router. Most hubs cover 100-150 feet in open space; walls reduce range. For homes over 2,000 sq ft, test Wi-Fi signal strength in distant rooms first.
Step 2: Set Up the Mobile App Download the app, create an account, and add your hub (5-10 minutes). Most systems use QR codes or NFC pairing, eliminating manual configuration.
Step 3: Install Entry Sensors Clean the mounting surface, peel adhesive backing, and press firmly for 30 seconds. Install one sensor on the frame, the other on the moving part. Start with your main entry door, then add sensors to ground-floor windows and sliding doors.
Step 4: Install Motion Sensors Mount them 5-6 feet high on interior walls, angled to cover entry points. Avoid heating vents, AC units, and direct sunlight, these cause false alarms. A typical home needs 2-3 sensors: living room, hallway, and bedroom.
Step 5: Install Outdoor Cameras Choose a location with clear view of your front door or driveway. Mount 8-10 feet high to capture faces. TechyDealy's Wireless 2K Outdoor Solar Security Camera ($138.38) has built-in solar charging, eliminating seasonal battery swaps. Mount using the included bracket or adhesive strips.

Step 6: Test All Sensors Walk past motion sensors, open doors and windows, and view camera feeds in the app. Confirm all devices show as "armed" and responsive (15-20 minutes). This catches connectivity issues before relying on the system.
Step 7: Arm the System Set your system to "Home" mode (sensors armed, motion sensors disabled so you can move freely) or "Away" mode (all sensors armed). Most systems let you schedule automatic arming at night or when you leave.
Wireless 2K Outdoor Solar Security →
Common Installation Mistakes to Avoid
Placing motion sensors near heat sources: Furnaces, space heaters, and direct sunlight trigger false alarms.
Total Installation Time
Most beginners complete a basic DIY installation in 1-2 hours with no tools beyond a screwdriver. Professional installation requires scheduling and costs $400-$1,200.
Best Wireless Security Cameras for Beginners
Outdoor cameras are the most visible part of your security system. They deter intruders and provide evidence if something happens. The Arlo Home Security System (5-Piece) is rated as the best affordable option CNET's 2026 expert testing and review, delivering 8.3/10 performance for beginners at a reasonable price point.
Smart Home Security Monthly Fees and Pricing Models
Beginners often focus on monthly fees and miss true ownership costs. A $15/month plan costs $540 over three years, before equipment, installation, or penalties.
Equipment Costs
A basic DIY starter kit (hub, 2-3 sensors, 1 camera) costs $200-$400. Mid-range systems cost $500-$800; premium systems reach $1,000-$1,500. TechyDealy's Wireless 2K Outdoor Solar Security Camera ($138.38) allows incremental purchasing, avoiding bundled system traps.
Monthly Monitoring Fees
Self-monitoring costs $0-$10/month. You receive alerts and decide whether to call police, but response depends on your availability.
Contract Terms and Early Termination Fees
No-contract systems charge month-to-month with no cancellation penalty. SimpliSafe, Ring, and Cove offer no-contract flexibility, appealing to renters and those hesitant about commitment.
Total Cost of Ownership (3-Year Example)
Here's how three different beginner setups compare over 36 months:
Budget DIY Setup (SimpliSafe-style)
- Equipment: $300
- Installation: $0 (DIY)
- Monthly monitoring: $0 (self-monitoring)
- 3-Year Total: $300
Mid-Range DIY with Optional Professional Monitoring
- Equipment: $600
- Installation: $0 (DIY)
- Monthly monitoring: $20/month × 36 = $720
- 3-Year Total: $1,320
Professional Installation with 24/7 Monitoring
- Equipment: $800
- Installation: $600 (professional)
- Monthly monitoring: $30/month × 36 = $1,080
- Early termination fee (if you cancel year 2): $200
- 3-Year Total: $2,680
Hidden Fees to Watch
Watch for hidden fees: equipment shipping ($25-$50), activation fees ($50-$100), cellular backup ($5-$10/month), cloud storage ($5-$20/month), smart home integration fees, and sensor replacement ($10-$20).
When Professional Monitoring Makes Sense
Professional monitoring is worthwhile if you travel frequently, have elderly relatives or young children at home, live in areas with slow police response, or want fire and medical monitoring.
Monitoring Options: Professional vs. Self-Monitoring
Professional monitoring verifies alerts and contacts emergency services within 60-90 seconds. This matters for break-ins, fire, or medical emergencies.
Smart Home Ecosystem Compatibility
Your security system shouldn't live in isolation. It should integrate with other smart home devices, smart lights, locks, thermostats, and voice assistants. Vivint is identified as the leader in smart home integration Security.org's 2026 comparative analysis of home security providers, offering seamless connections to popular ecosystems.
Frequently Asked Questions
What is the easiest smart home security system to set up for beginners?
DIY systems are a top choice for beginners because they require no wiring or professional installation. Most can be set up in under an hour using just a screwdriver and your smartphone. Wireless sensors, door/window entry sensors, and cameras connect via your home Wi-Fi, making the entire process straightforward without technical expertise.
Do I need to pay monthly fees for smart home security?
Not necessarily. Many systems offer no-contract plans with optional professional monitoring. Several providers offer flexible, non-contractual security options. You can use self-monitoring through mobile apps at no cost, or add professional monitoring for a monthly fee if you prefer 24/7 monitoring by a security center.
Can I install a home security system myself without professional help?
Yes. DIY installation is one of the biggest advantages of modern smart home security systems. Wireless systems eliminate the need for drilling, wiring, or hiring technicians. Many DIY systems are highly rated for ease of installation. Most beginners can complete installation in under an hour by following the mobile app's step-by-step guidance.
What features should I prioritize in a beginner-friendly security system?
Focus on motion sensors, entry sensors for doors and windows, a video doorbell, mobile app control, and real-time alerts. According to a 2026 Consumer Reports survey of over 11,000 security system owners, 83% of shoppers identify outdoor cameras as a desired feature and 81% prioritize video doorbells. Look for systems with two-way audio, night vision, and cloud or local storage options.